INSTRUCTIONS FOR THE INSTALLATION OF A
LEDPOWERLIGHT® SPOT
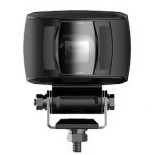
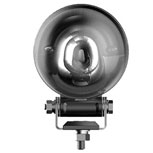
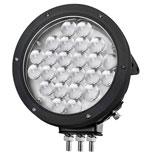
Red Line Visio® / Spot ARC / Razor Line® / Crane Safety Spot


1.IMPORTANT SAFETY INSTRUCTIONS
Before installing the spot, check that they have not suffered damage during transport. If you find that it has been damaged, even slightly, contact your dealer.
Before installing the spotlight, check that it is working properly.
Always disconnect the electrical network before installing the spot.
Do not place the spotlight near flammable products (petrol, oil, alcohol, gas, acid, etc...).
during installation, only switch on the spotlight after checking the wiring.
If you use the spot with the optional transformer from the Meanwell® brand, respect the chapter “4.5 preliminary settings of the drivers” otherwise you could irreversibly damage the spot.
2. PRESENTATION
The Spot is powered by a voltage ranging from 10vdc to 80vdc. DO NOT CONNECT IT TO A CURRENT WITH A HIGHER VOLTAGE, you will damage it irreparably and without possible warranty claim.
The spot is supplied with a 30-40cm cable, so you can maneuver efficiently.
The spotlight is equipped with a radiator to dissipate the heat emitted by the LED.
The spotlight is equipped with a seal to protect it against water and dust. It is IP67 standard
The spot is fitted with a plexi glass, allowing it to be exposed to a heat of 80°C max.
4. CONTENTS OF THE BOX
1x spotlight
1 x 30-40cm cable, crimped to the spot
1 x Anti-vibration Alloy Bracket
4.5 PREREQUISITE OF DRIVERS
If your machine cannot deliver a voltage between 10 and 80VDC or 12-48VDC for the overhead crane spot, you will need to imperatively use a transformer. This will allow you to connect your "low voltage" spots to "high voltage", for example 230VAC or 400VAC.
5. INSTALLATION
The spotlight is supplied with a 30-40cm cable (1m for the overhead crane spotlight) and two wires at its end. A “positive” (red), and a mass (black). You must connect red (Positive) to a range between 10 and 80VDC or 12 and 48VDC for the overhead crane spot (direct current).
The "Red" electrical wire must be connected to the "positive" wire of your machine with which you wish to operate your spot.
The black wire meanwhile "ground", must be connected to a metal part of the machine, acting as ground, or directly to a ground pre-established, if there is one.
If you want it to be permanent, you will need to connect the red wire to a "+" after ignition. If you don't know where to find one, ask a technician at your company.
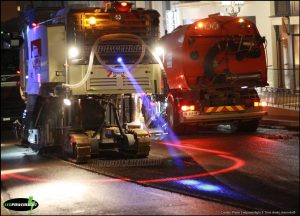
6. INSTALLATION ON DRUM / COMPACTOR
2 x Red Line Visio® or Razor Line®
2x ARC spot
1 x Sequential Spot
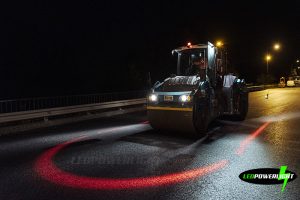
The Red Line Visio® or Razor Line® is to be installed on each side of the cylinder in order to draw a line which will be projected approximately 1m from the machine and which will join the two ARC spots at the front and at the rear of it.
The Red Line Visio® has the particularity of having two independent adjustment windows, in order to reduce the line to the right or to the left, if toilet bag.
The ARC spot will be placed at the front and at the back of the cylinder, and imperatively in the center of it, so that each end join the lines on the sides.
The Sequential Spot, as its name suggests, is a spot that projects 4 points on the ground that scroll one after the other. This will be attached to the rear of the vehicle and in the center (next to the ARC spot) in order to project the points to be outdoors from the line of the ARC spot. This will warn pedestrians that the machine is backing up.
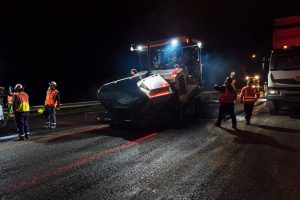
7. INSTALLATION ON FINISHER
2x Red Line Visio®
1 x Razor Line®
The Red Line Visio® is to be installed on each side of the paver, preferably on the top of the cabin, in order to draw a vertical line along the hopper, and thus facilitate the maneuvering of trucks.
The Red Line Visio® has the particularity of having two independent adjustment windows, in order to reduce the line over the length, if toilet bag.
The Razor Line® will be placed on the back of the cabin and in the center, in order to project a line parallel to the apron and 5m behind it, in order toprevent the cylinder to cross this limit.
8. INSTALLATION ON A PLANER
4 x Razor Line®
1x ARC spot
Two Razor Line® are to be installed on each side of the planer, in order to draw a line along it, about 1m away. The two spots will allow you to have a length of about 10m, which will protect the whole side.
The Spot ARC will be placed at the back and in the middle, in order to draw an arc of a circle joining the two lines of the side spotlights.
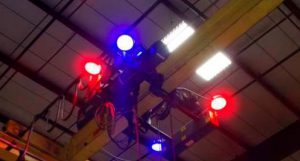
9. INSTALLATION ON AN OILING CRANK
Special Spot Bridge
The special overhead crane spot can be placed on the trolley directly, if it is wide enough, otherwise on the crosspieces. It can be positioned between 8m and 15m in height. Check that you don't have more than 40% natural light (artificial light doesn't matter)
It should connect over a range between 12VDC and 48VDC. If you do not have low voltage on deck, you will need to add a suitable transformer.
If you want to make a square or rectangle appear on the ground, you will need to use 4 spots...
This spot comes with a filter, thanks to which you can project a line on the ground. If you remove it, in this case, the spot will only project a ground point.

NEVER PERFORM AN ELECTRICAL INSTALLATION IF YOU DON'T KNOW WHAT YOU ARE DOING. ALWAYS SEEK THE ADVICE OF A TECHNICIAN BEFORE ANY INSTALLATION.
LEDPOWERLIGHT cannot be held responsible
in case of bad connections
TECHNICAL SPECIFICATIONS
Operating range : 10-80v DC for Red Line Visio®, Spot ARC and Razor Line®,
and 12-48VDC for the Special Crane Spot.
Fairing: Aluminum
Waterproof: IP67
Supplied with steel support + 30-40cm power cable (1m for the Rolling Bridge Spot)
Certifications: CE, ROHS
Warranty: 2 years
All rights reserved LEDPOWERLIGHT®